White Balance Explained
The White Balance camera function corrects the colour bias of light

What is White Balance?
In this post, you will learn more about what White Balance (WB) is, what your camera is trying to do with WB and how to use it creatively in your photography.
As light is rarely neutral in colour, it tends to have a bias that affects your photography. This bias can be used creatively to add mood and ambience.
The White Balance camera function corrects the colour bias of light.
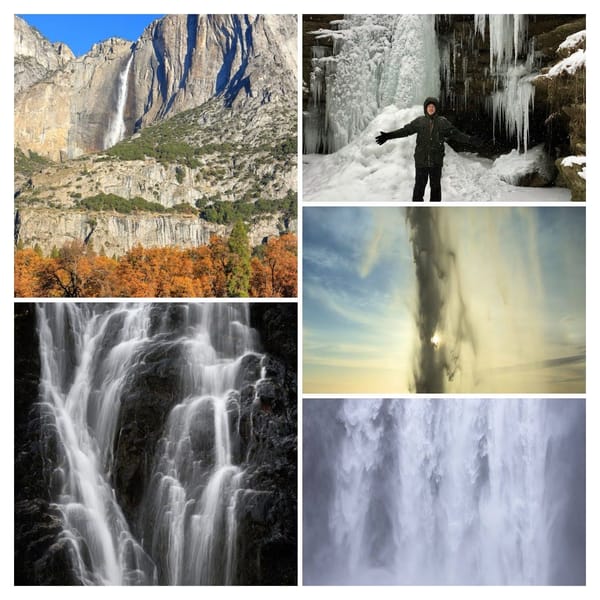
WB is expressed in Kelvin (K); colour temperatures above 5000K are ‘cool’ and more bluish, while temperatures below 3000K are ‘warm’ and tend to be more yellow/orange.
Set a lower Kelvin value to draw more red out of a sunset or a higher value to get a deeper blue sky. As a rough guide, anything in-between is more ‘neutral’
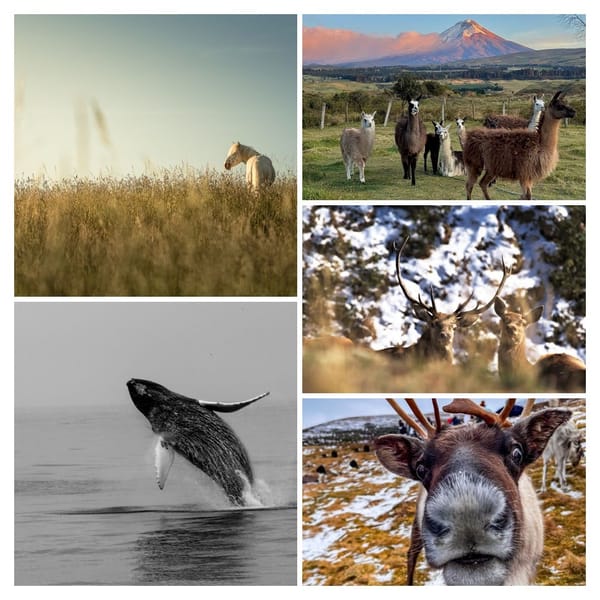
We can use WB to control the photograph’s mood as we associate different colours with different emotions.
Warm colours such as red and orange are often linked to comfort and happiness, whereas as cooler blue colours have connotations of sadness and melancholy.
So you can use White Balance to set the mood you desire for your photo.
Your DSLR camera comes with white balance presets installed. Generally, they are as follows:
- Daylight Approx 5200K
- Shade 7000K
- Cloudy 6000K
- Tungsten 3200K
- Fluorescent light 4000K
- Flash
- Custom
AWB is the Auto White Balance preset, allowing the camera to correct WB. If you would prefer not to adjust for the colour of the light, then set the WB to ‘Daylight’ as this is a neutral setting and will not apply any corrections to the light.
A step up from AWB are the presets listed above, designed for colour accuracy under specific types of light.
Once you become more adventurous, you can move to ‘Custom’ White Balance, where you can set a WB specifically for the light you are shooting with. Some advanced DSLR cameras have the option to select Kelvin values.
How to get good colours in photography?
As well as correcting exposure WB is an aid to colouring your photography.
White Balance tells the camera what ‘white’ should be.
What white balance in your camera is trying to do is balance the colour temperature in your image by adding the opposite colour. Instead of whites appearing bluish or orange-ish, they should appear white after the correct white balance adjustment.
Choose your white balance according to the photos you want; don’t necessarily take them literally.
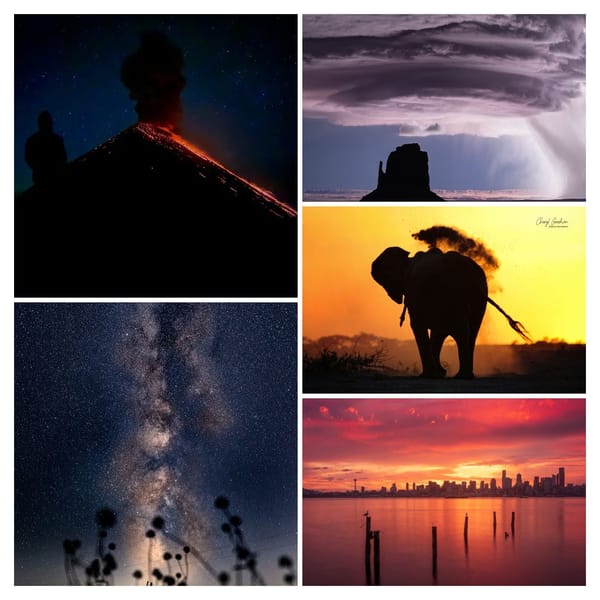
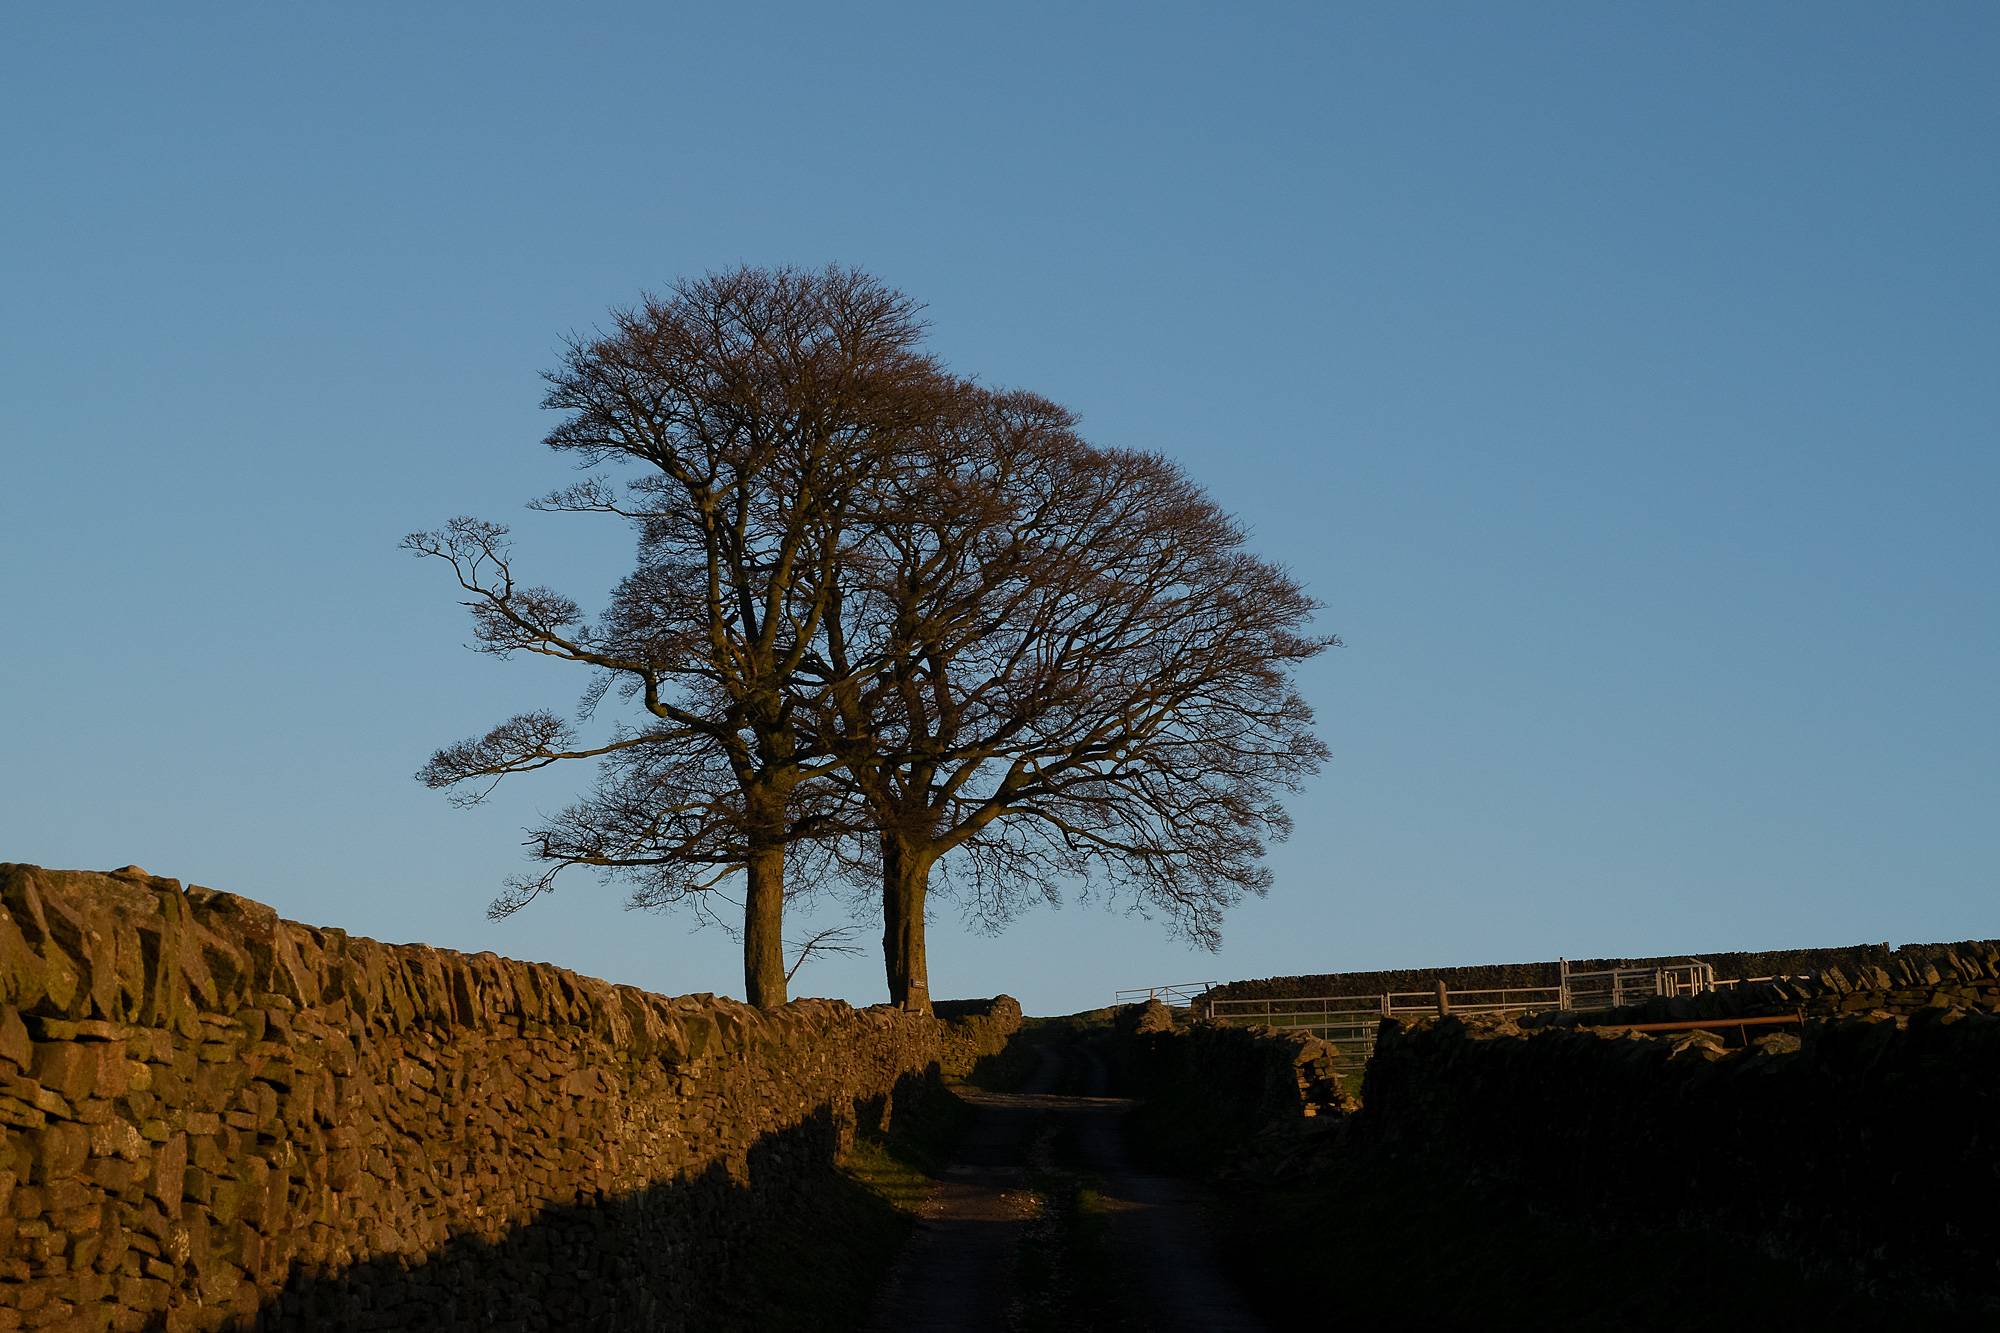
And what is the impact on your image? – Here is an image I took to highlight White Balance's impact on an image.
The picture was taken in RAW so I could set the WB accordingly in Photoshop.
1st shot uses ‘Daylight’ WB – giving a neutral light.
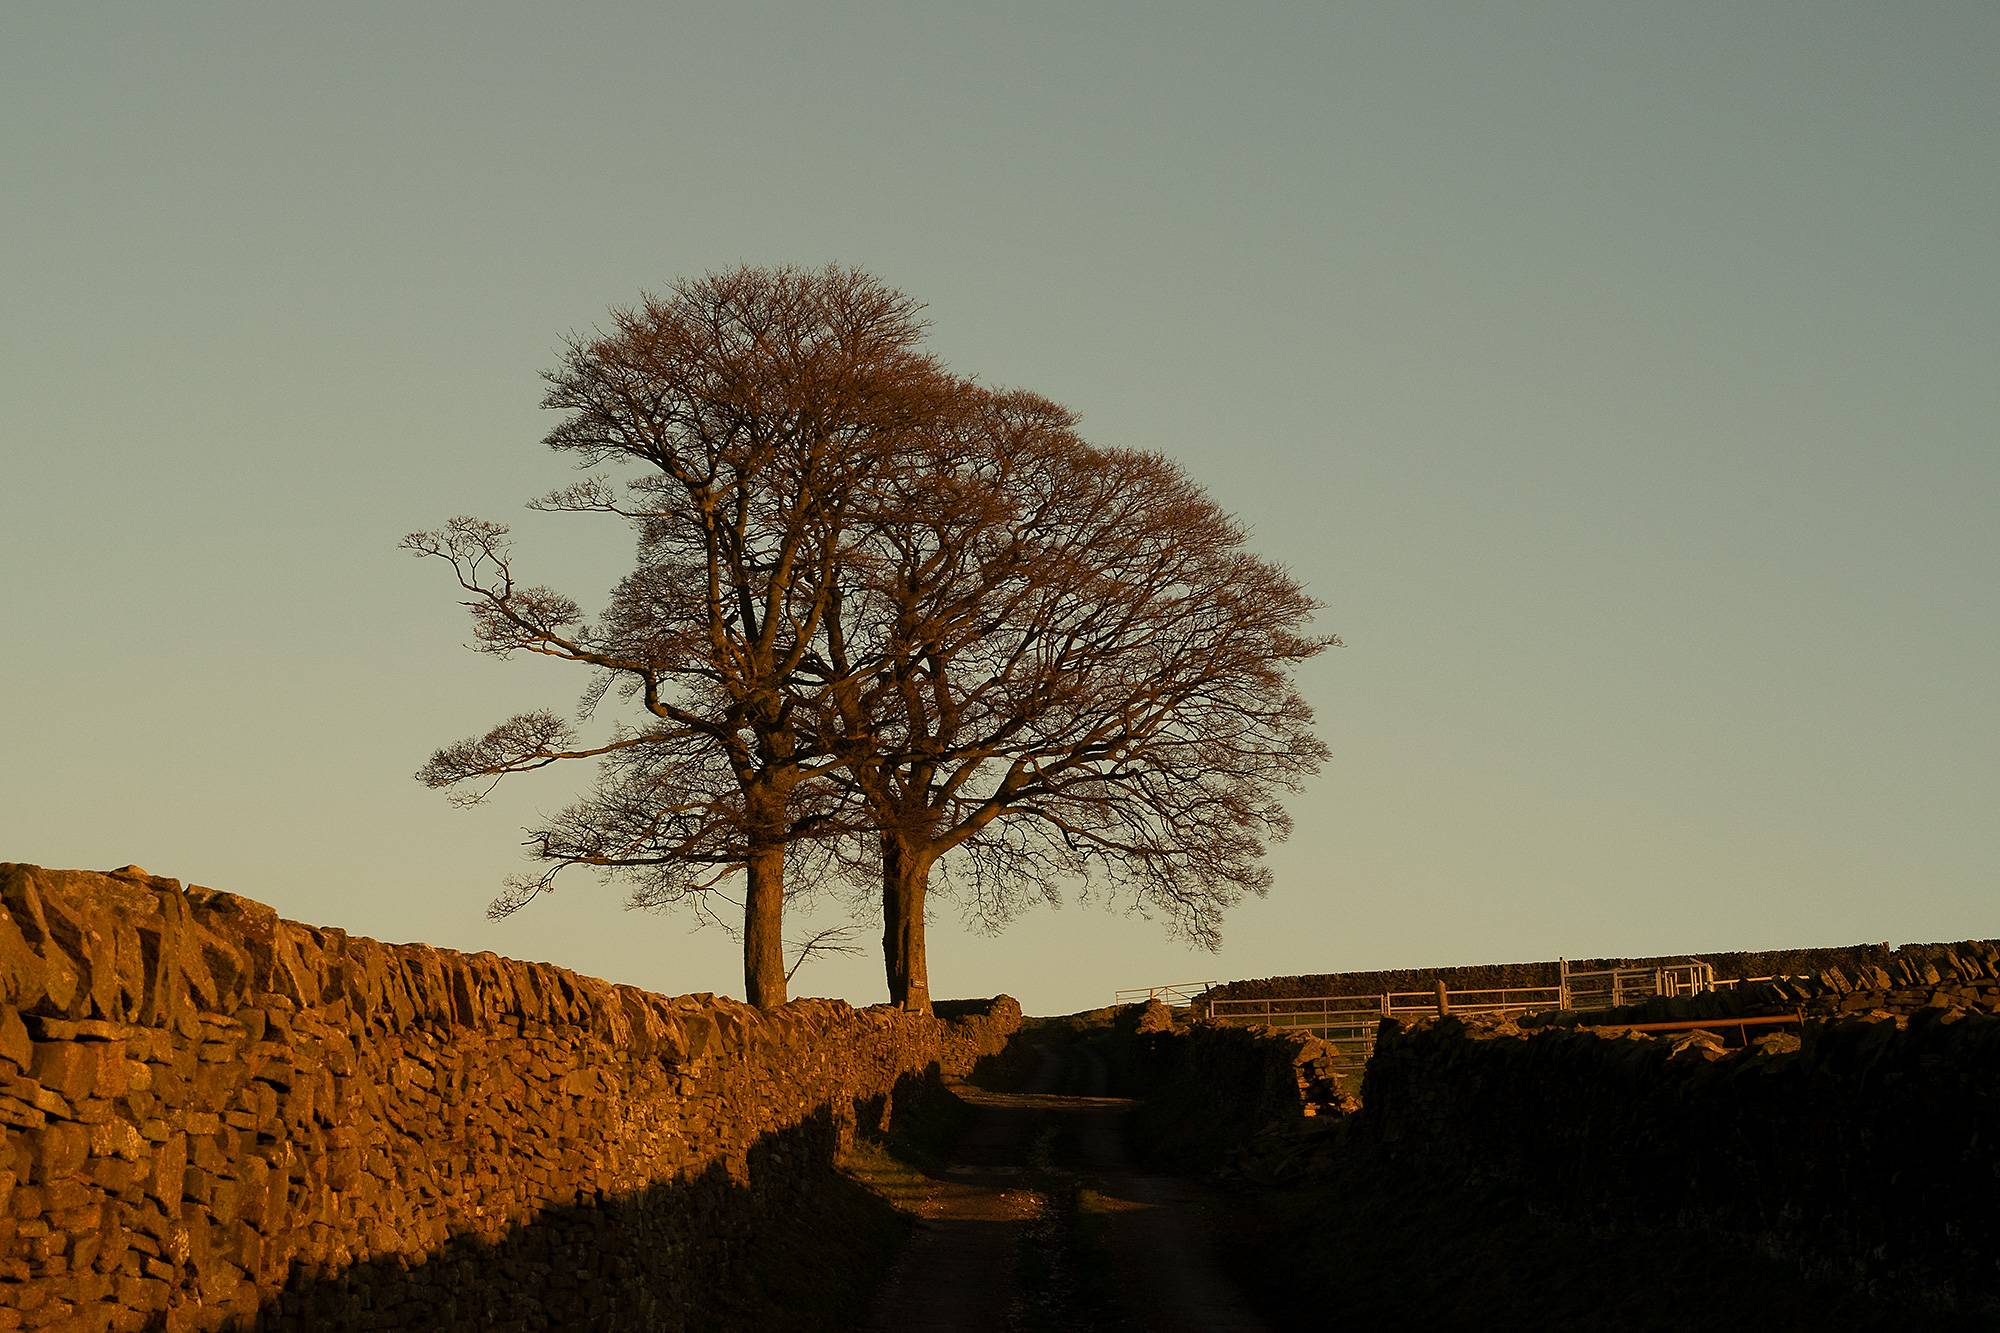
The 2nd uses ‘Shady’ WB and is, therefore, correcting for the blue bias of the photo by adding more red.
And finally, I used ‘Tungsten’ WB – as this is a very red light, the WB corrects by adding extra blue and, as you can see, saturates an already blue image with more blue light!
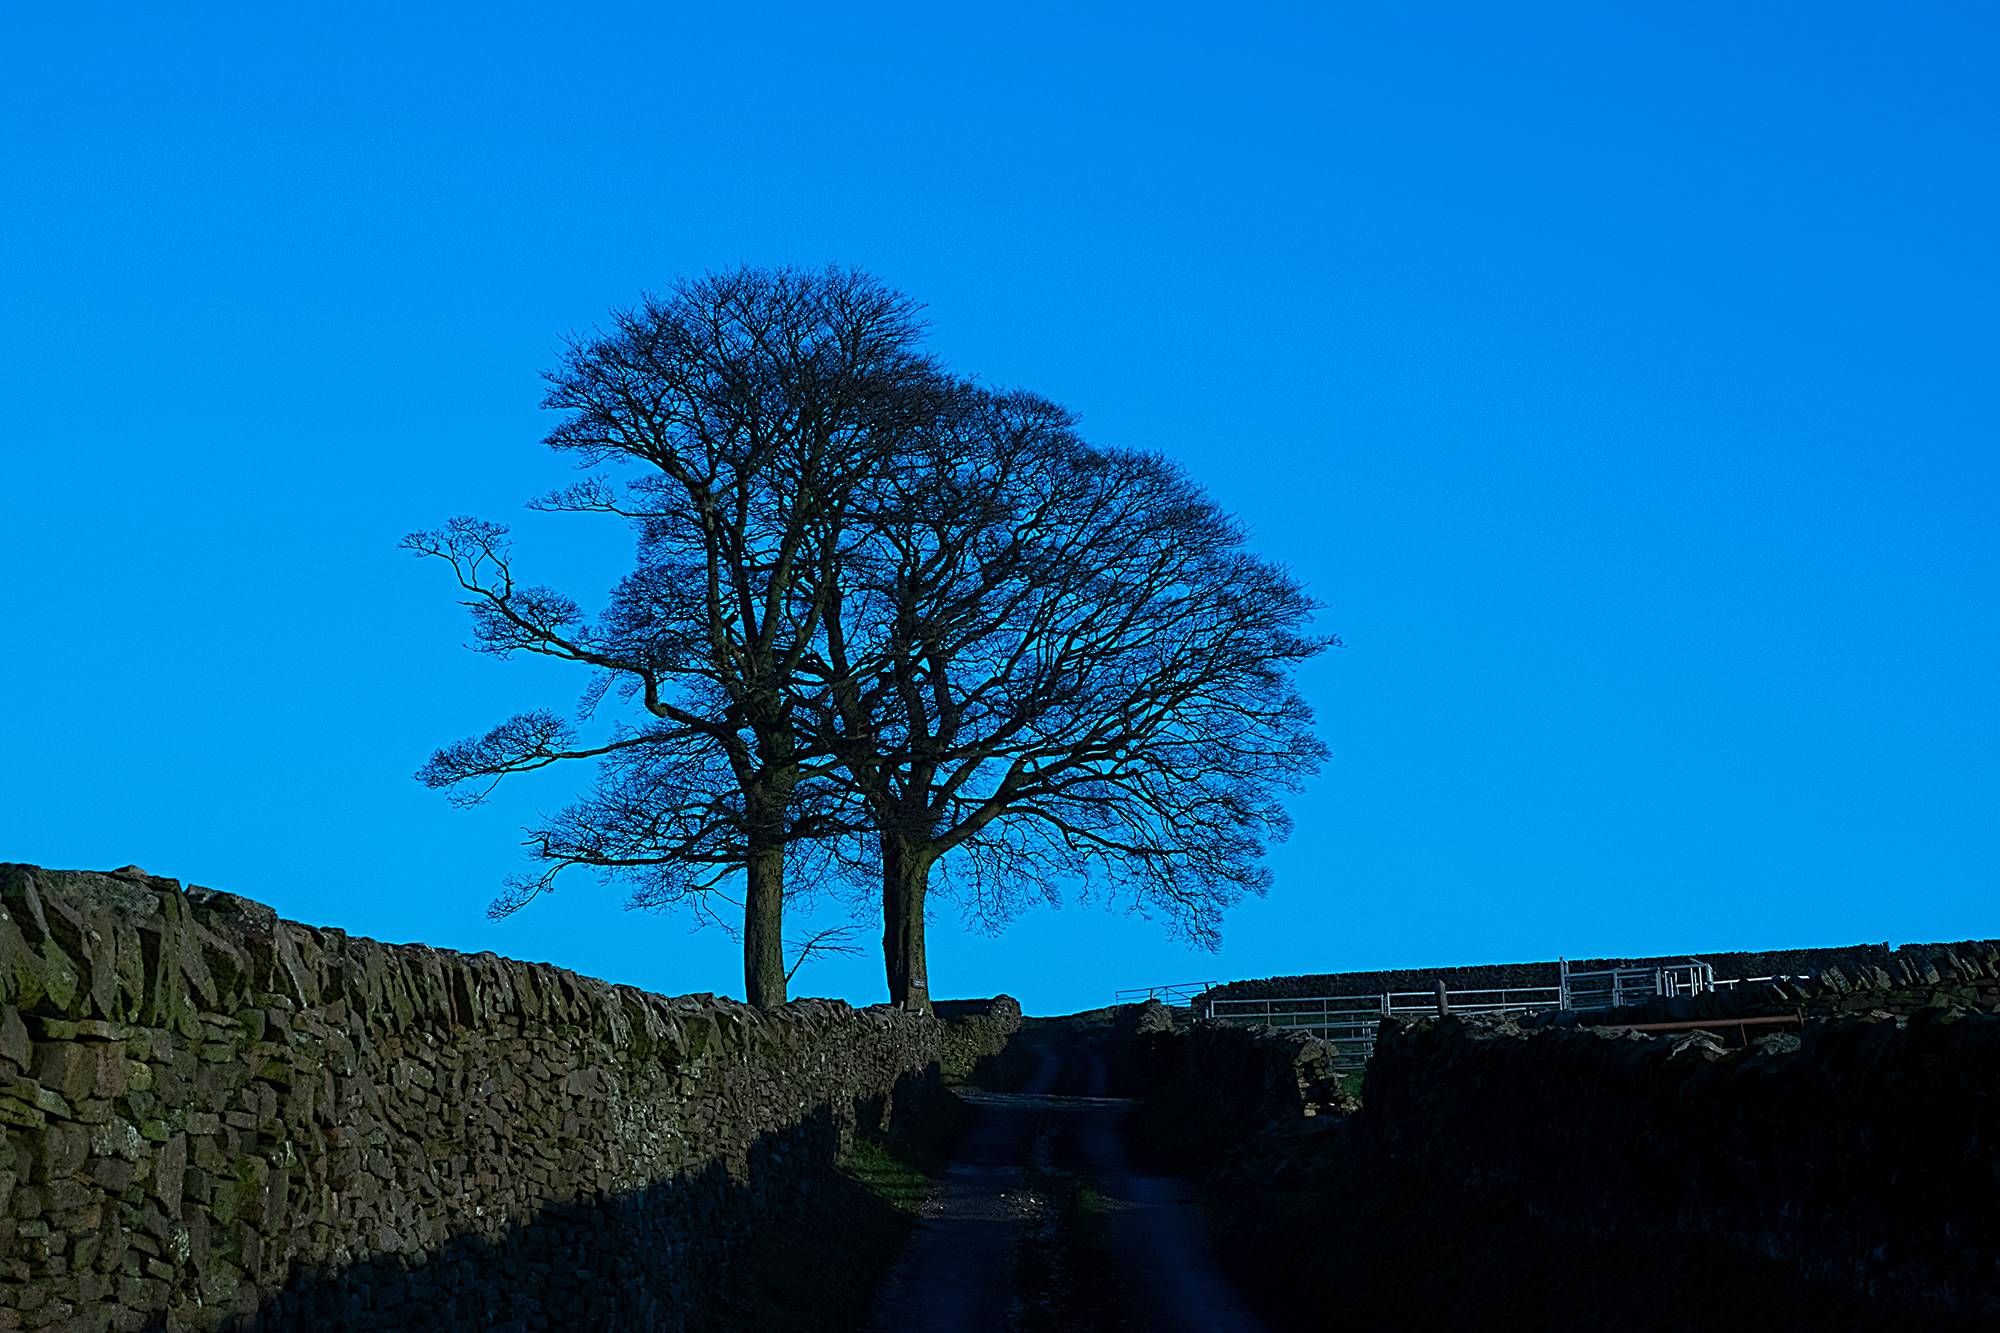
These extreme examples demonstrate how to use White Balance more creatively.
In conclusion, If you’re not sure, stick with auto…cameras do a pretty good job of getting the White Balance correct, but for more creativity, use one of the custom settings.
If you don’t want to concern yourself too much with white balance while out shooting photos, you can use software such as Photoshop to do this post-processing.
Just remember to shoot in RAW (rather than, for instance, JPEG) to allow this facility. Shooting in JPEG will only allow for minimal WB correction. If you like shooting in JPEG and can’t be fussed with white balance, leave the camera settings at ‘Auto’ and let the camera do the work. You will get much less control, and sometimes the scene will look slightly off, but sometimes it will be perfect!
As always, the most important point is to be out there taking photos! Keep experimenting with WB and see what creativity you can add to your shots.
And don’t forget to send us your photos on Twitter to @StormHour or using the hashtag #StormHour for more exposure 😉